Good tool for Publication Houses who print Question Banks. Good for Test Series that have enrollments from far off places.
Click here to watch video for using Online OMR Checker
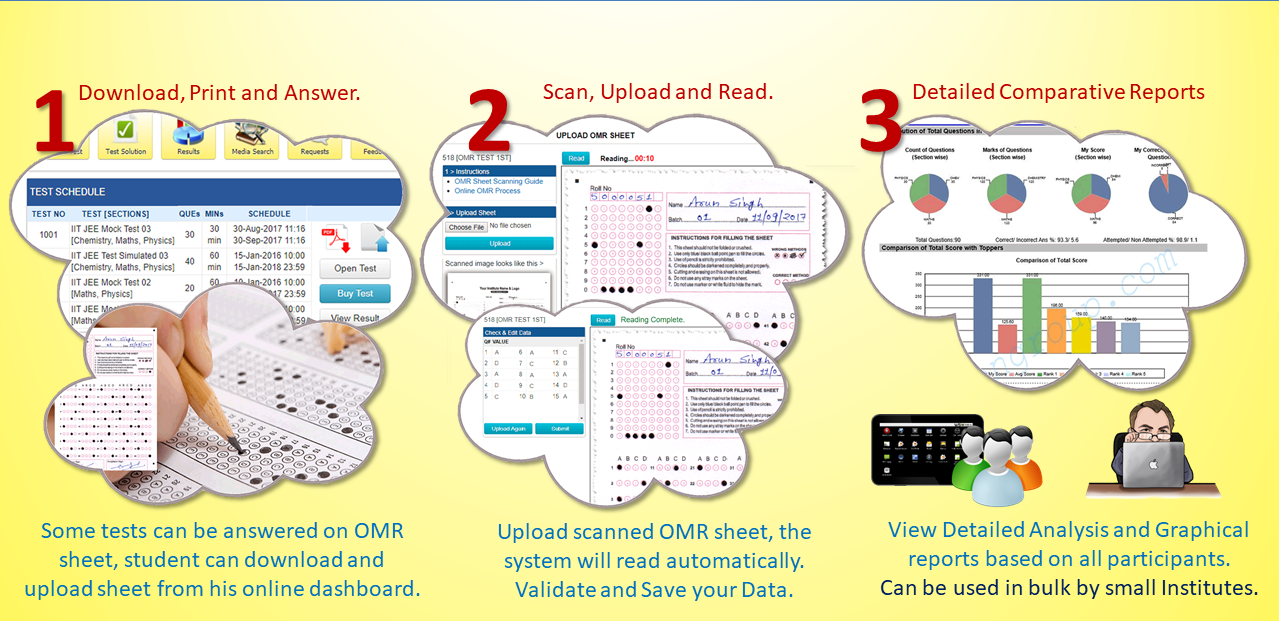
How the system works for Students ?
- Register
You have to create an account into the system which connects you to your institute and lets you see the list of tests that correspond to the group you are enrolled for. Click here to Register
-
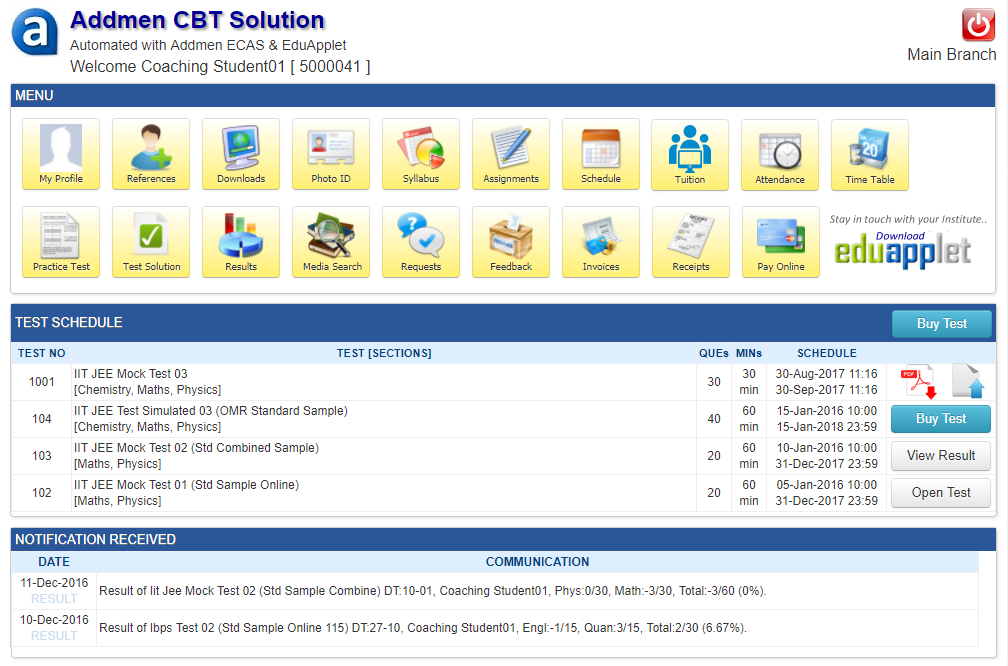
Login
After login, you will reach your dashboard where you can see the list of all the tests provided by your institute. You may either be allowed to access the test as per your package with the institute, or you can buy from the list. -
Download Sheet
- Download the sheet by clicking the PDF icon given against the selected test.
- Print the sheet, strictly as per Printing Guidelines
- Fill the sheet as per Instructions given on the sheet. Read more on how to Fill and Handle OMR Sheet
- Scan the sheet, strictly as per Scanning Guidelines
-
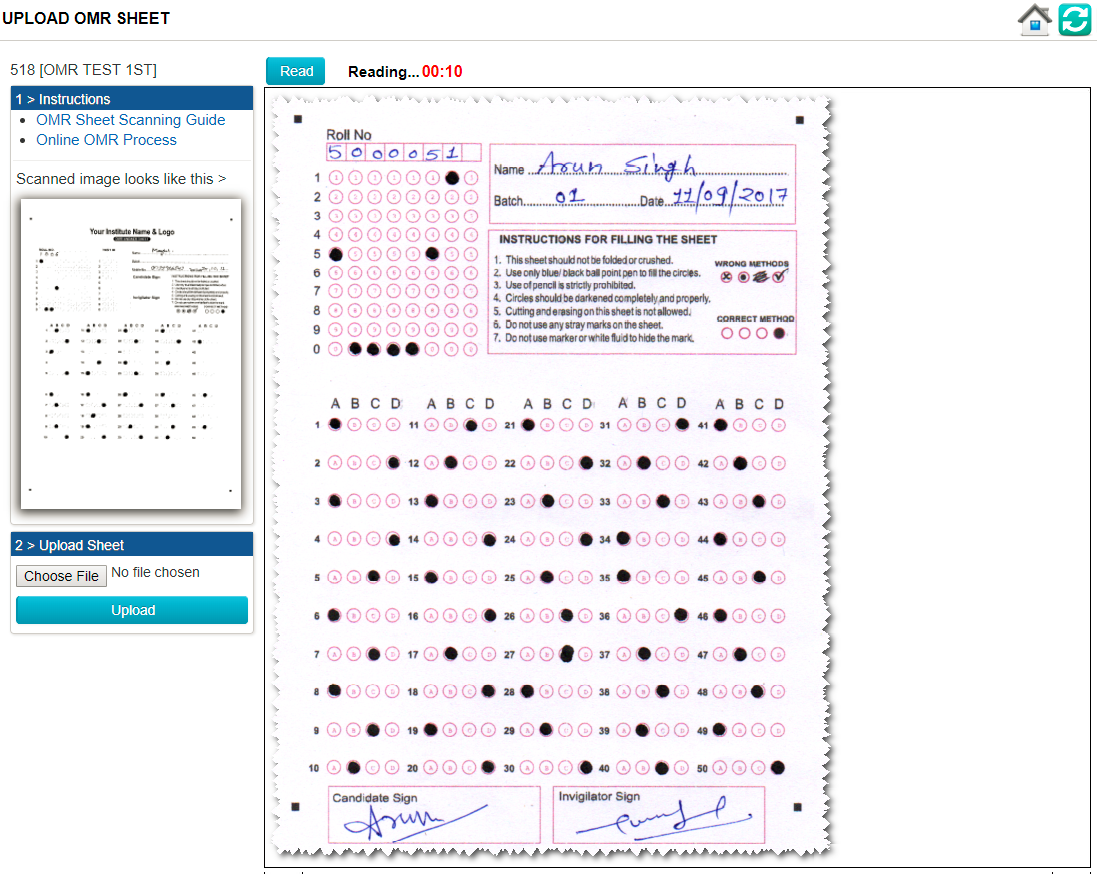
Upload Sheet
- Click on the upload icon given against the selected test.
- Browse sheet
- Match with the preview arrangement
- Upload (You can upload only one sheet for a test, You can reattempt several uploads before final submission)
-
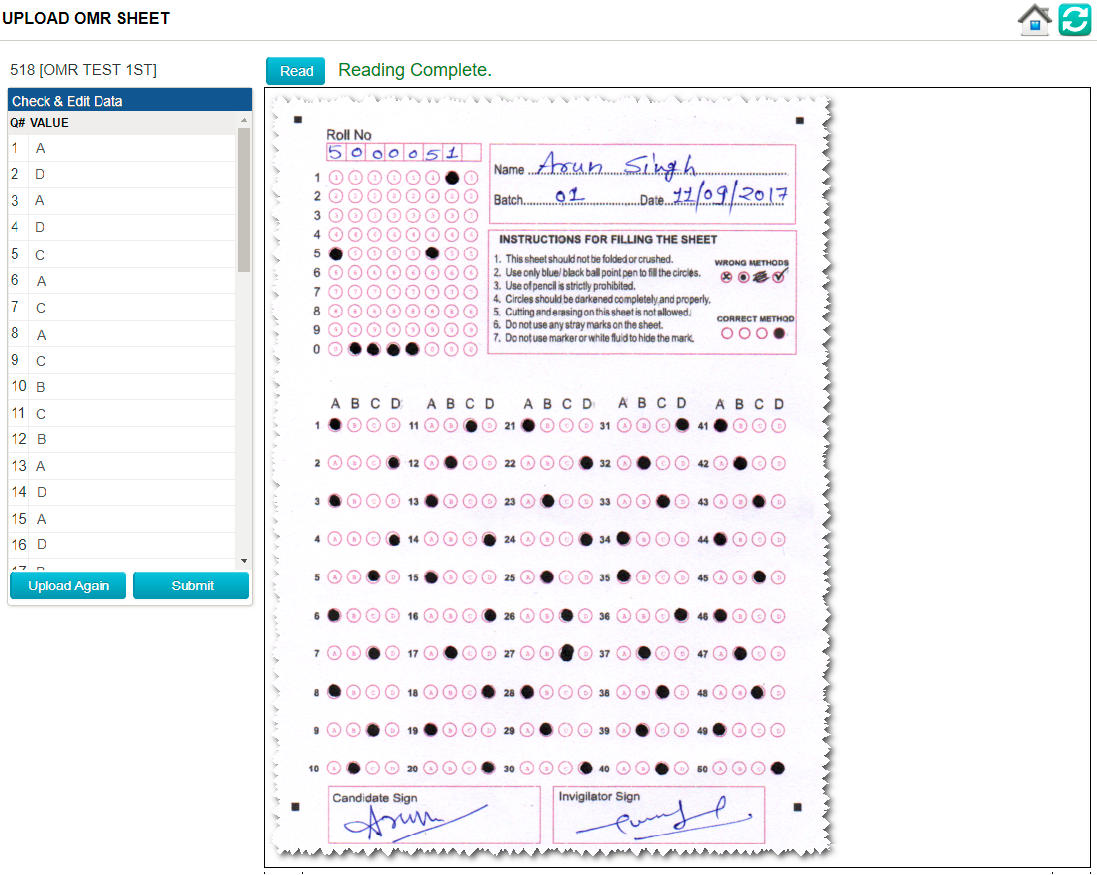
Validate Data
- The data read from your sheet will be displayed within a minute of uploading your sheet.
- If the data is correct press [Submit] else [Upload Again].
- If you say [Upload Again] your previously uploaded sheet is cleared from the system and you can repeat steps 1 through 4 to make a fresh upload.
- If you say [Submit], the system will accept the data read from your last uploaded sheet as your final submission and proceed for scoring.
-
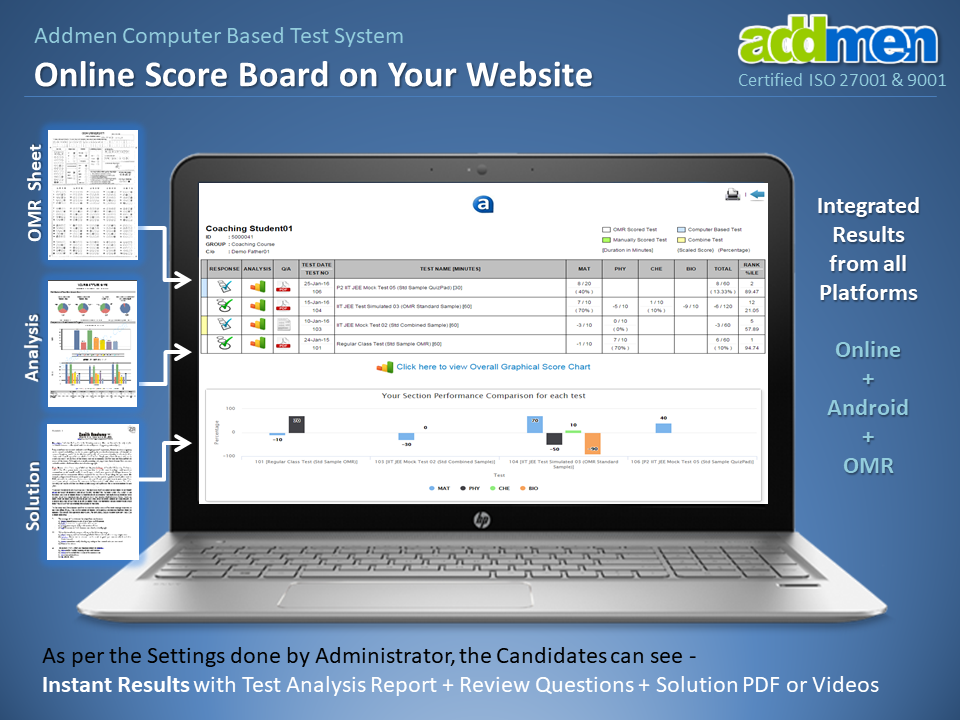
Get Result
- Click on the Result icon to visit you Results Dashboard to view your results and download Graphical Assessment Reports.
Graphical Reprot